 The Worklog Report provides details of worked hours in Jira displaying it daily, weekly, monthly, quarterly or yearly. Extensive configuration options available including filter, group by field, additional fields and non working days.
...
| Section |
|---|
| Column |
|---|
| 
|
| Column |
|---|
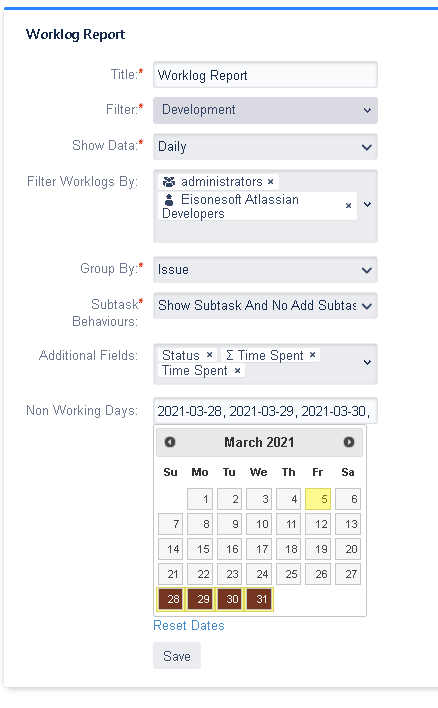
| Title: Set the title of the gadget Filter: Select the filter to show. Show Data: Select how to show the data (daily, weekly, monthly, quarterly or yearly) Filter Worklogs By: Select one or more user/group for filter the worklogs made by. If not user/group is selected it shows worklogs for all users. Group By: Group the worklogs by a issue field. The options are Issue , Project, Reporter, Assignee and PriorityFields and Customfields of types single select. Subtask Behaviors: Select the Subtasks behavior. The options are: - Show Subtask And No Add Subtask Worklog to Parent - With this option all subtasks returned by the selected filter are showed separated to their parent task. The subtask worklog is not added to the parent task worklog. If the subtask is not returned by the filter then it is ignored.
- No Show Subtask And Add Subtask Worklog to Parent - With this option subtasks returned by the selected filter aren't showed. The subtask worklog is added to the parent task worklog. If the subtask is not returned by the filter then it is ignored.
Additional Fields: Select one or more additional fields to display in the gadget view. While configuring additional fields you can order it with drag and drop. Non Working Days: Select the non working days to display in the gadget view. This setting only affects when the gadget is configured showing data daily.
|
|
Gadget View
| Section |
|---|
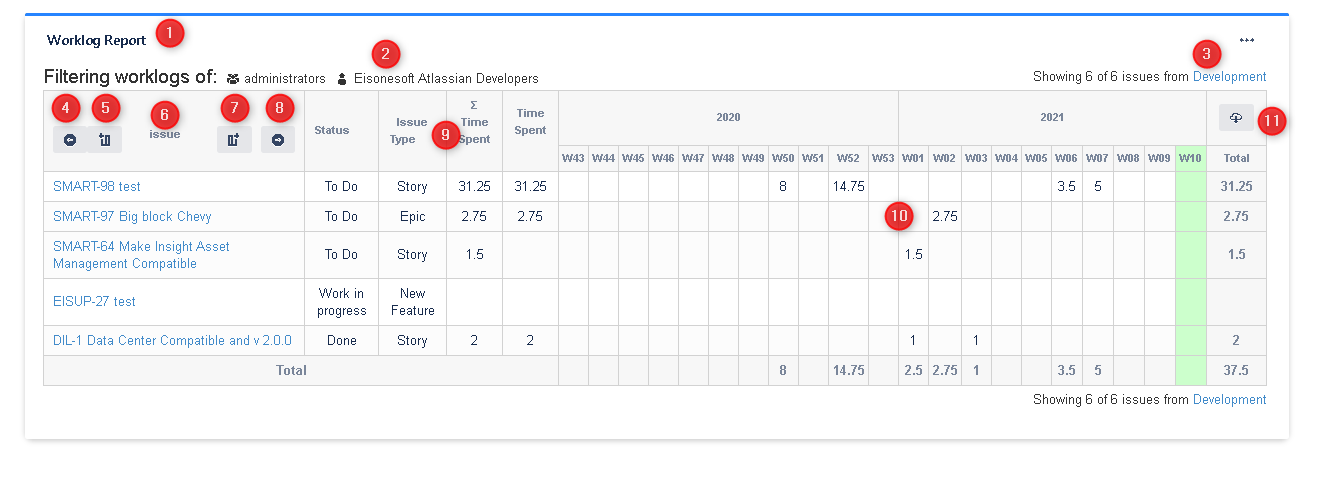
1: This is the title of the gadget 2: This is the current worklogs author filter 3: This is the information of the number of issues showed in the report and the selected filter. If not all issues in filter are showed you can fetch more 4: Move to the previous period 5: Add the previous period to the current view 6: This is the information of the current Group by setting 7: Add the next period to the current view 8: Move to the next period 9: The additional fields displayed. Click on one additional field header for order the table 10: The report table with the worklogs information 11: This is theexport the export button for download an Excel file
|